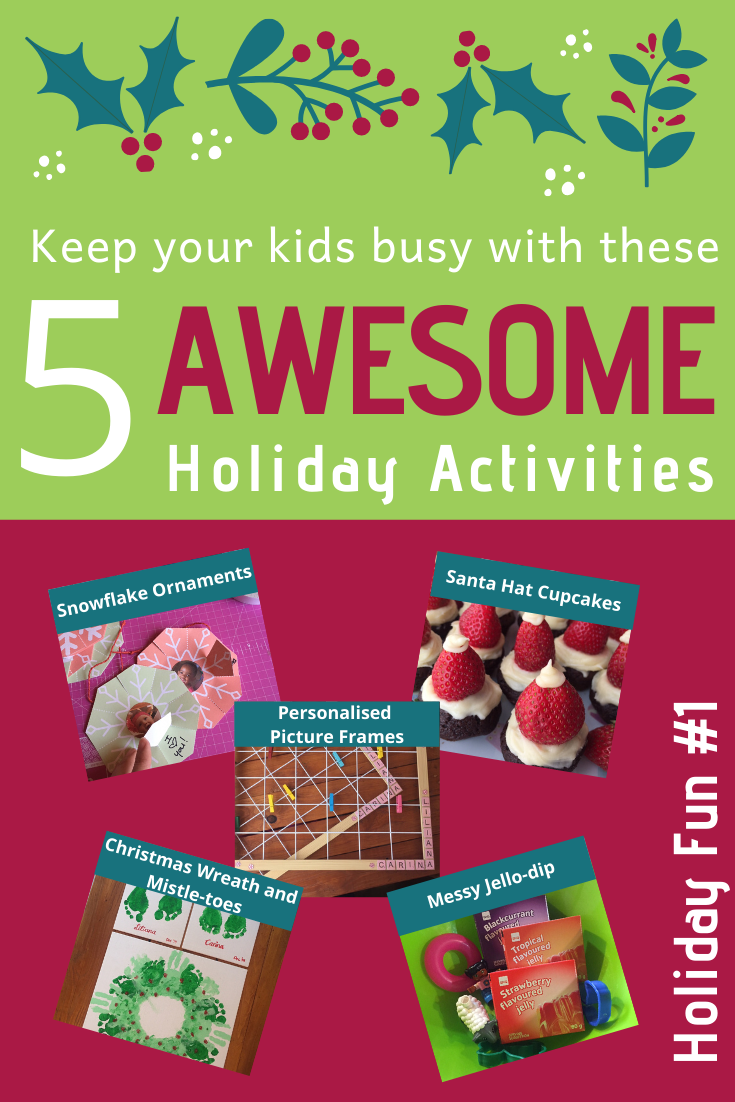
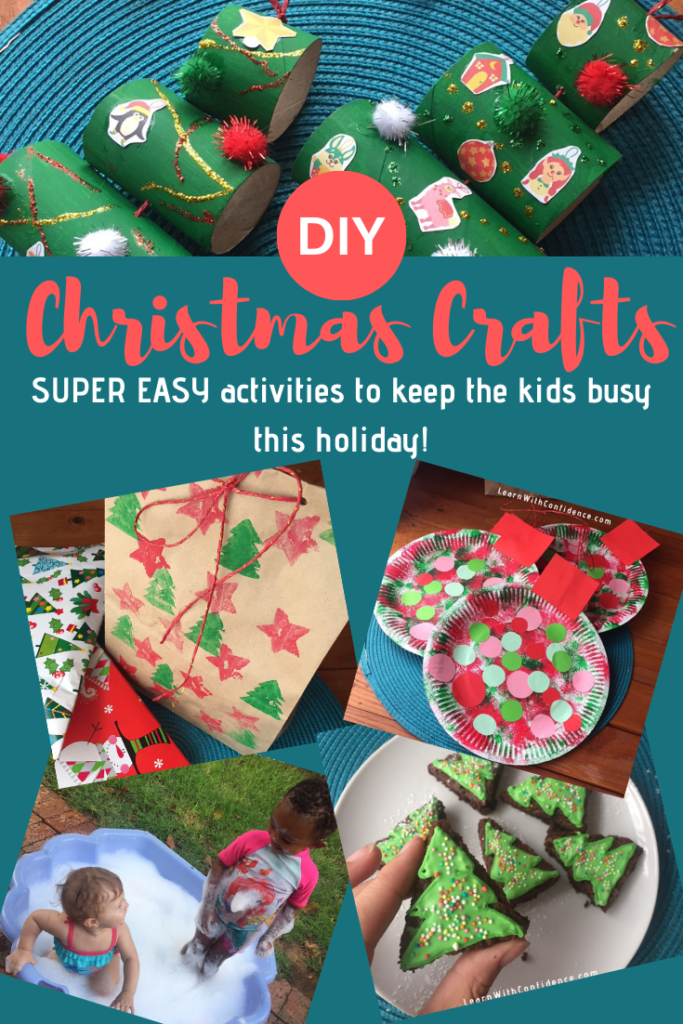
Christmas crafts and activities to keep your kids busy this holiday! | Holiday Fun Series #2
Christmas is just around the corner! So exciting! Even in spite of all things you still want to get done before it arrives! I’m sure your kids are super excited too – after all Santa is on his way right!? So why not channel that excitement into something fun and constructive with some Christmassy-flair! Here are your next 5 Christmas crafts and activities in our Holiday Fun series!

Please subscribe below so you’ll get direct access to every blog post and freebie I have created just for you! We have one more week of fun activities still coming your way, so don’t miss out! Hit SUBSCRIBE so I can keep you in the loop.
And, as with last week, here is your FREE Holiday Fun Kit for all of this week’s Christmas crafts and activities! A simple, easy-to-follow format with pictures, all of the templates you’ll need and even a shopping list template so you can be sure to pick up any materials or tools you need for the week. Print it all and file it for future use – what a great resource to have to fall back on for next year!
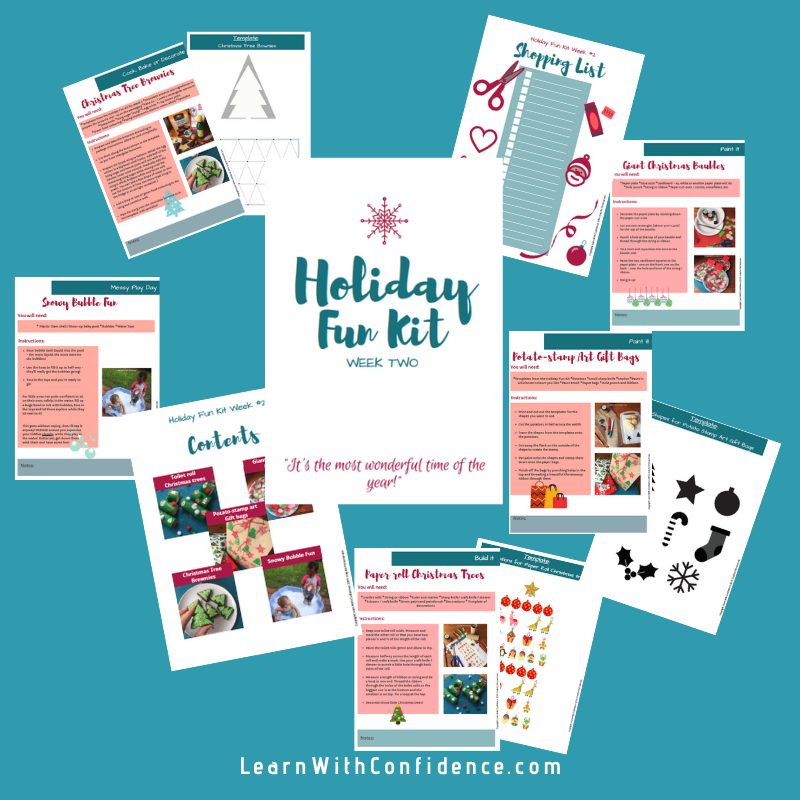
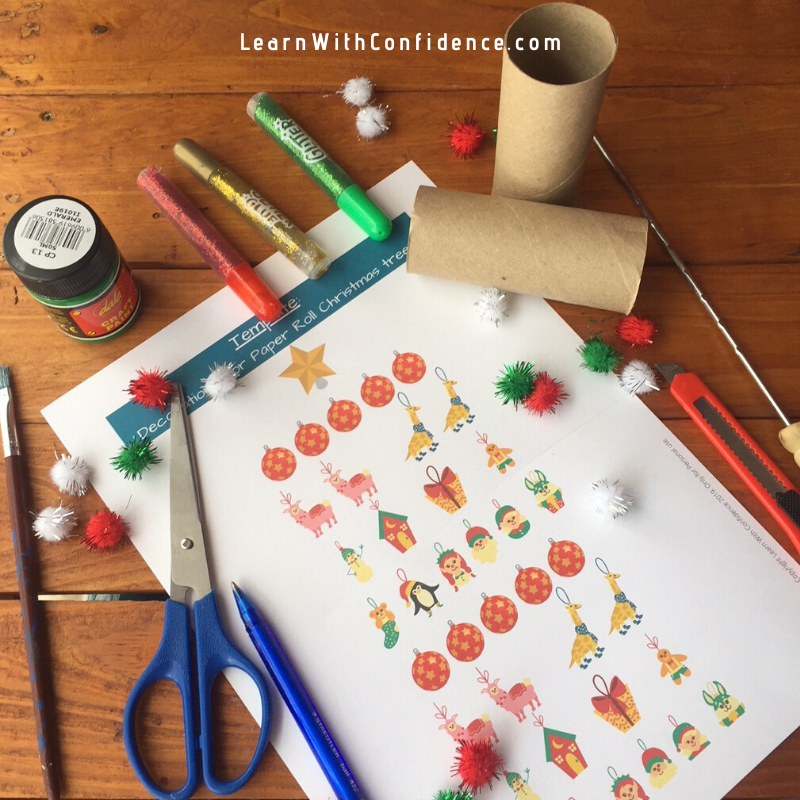
Day 1: Build it – Paper Roll Christmas Trees
This Christmas craft is a fun way to add to your decorations this year while your children practice their visual-spatial perception skills and fine motor skills (stacking the paper roll pieces in the right size order and threading ribbon through them).
You’ll need:
- 2 toilet rolls
- String or ribbon
- Ruler and marker
- Sharp knife/ craft knife / skewer
- Scissors / craft knife
- Green paint and paintbrush
- Decorations
- Template of decorations in the Holiday Fun Kit for Week 2
Make it happen:
- Keep one toilet roll aside. Measure and mark the other roll so that you have two pieces ⅓ and ⅔ of the length of the roll.
- Paint the toilet rolls green and allow to dry.
- Measure halfway across the length of each roll and make a mark. Use your craft knife / skewer to punch a little hole through both sides of the roll.
- Measure a length of ribbon or string and tie a knot in one end. Thread the ribbon through the holes of the toilet rolls so the biggest one is at the bottom and the smallest is on top. Tie a loop at the top.
- Decorate those little Christmas trees!
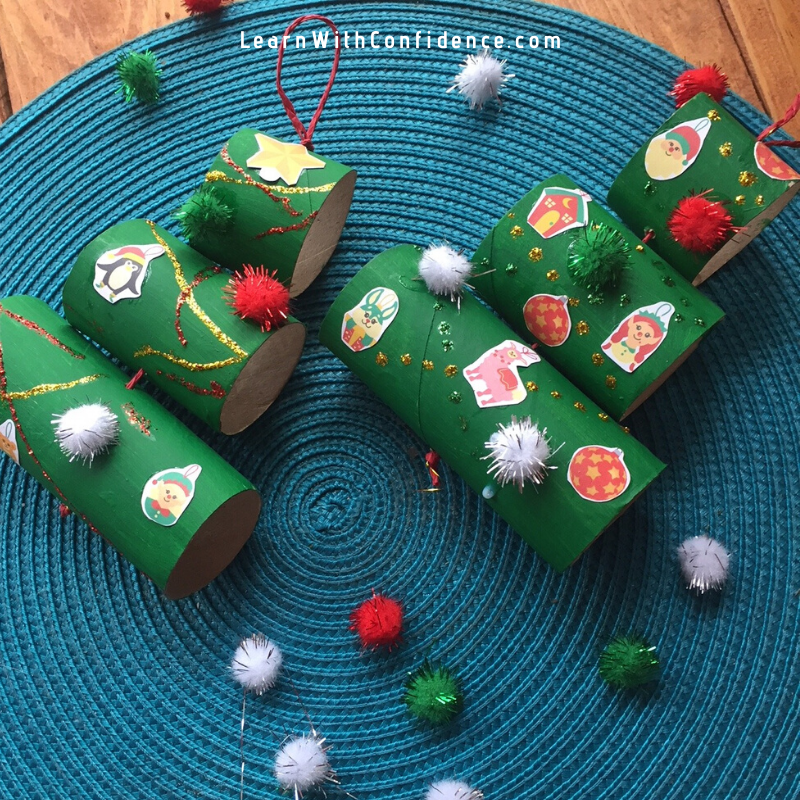
Variations:
Make a taller Christmas tree by adding more rolls. Just measure and cut accordingly so that they slowly get smaller and smaller as they reach the top of the tree!
Thread a star or angel decoration onto the top before tying the loop to add a tree-topper!
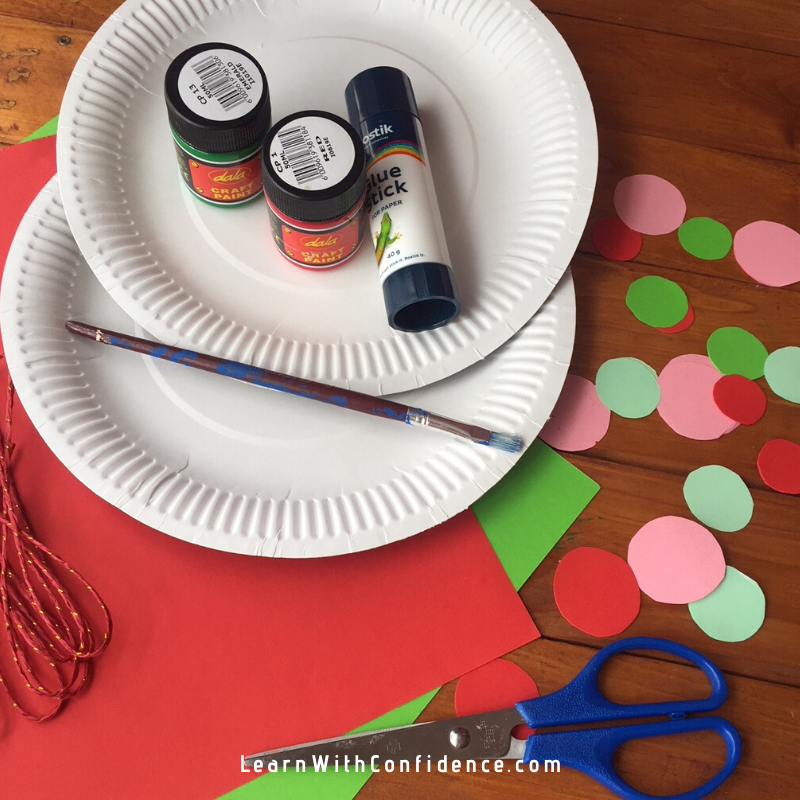
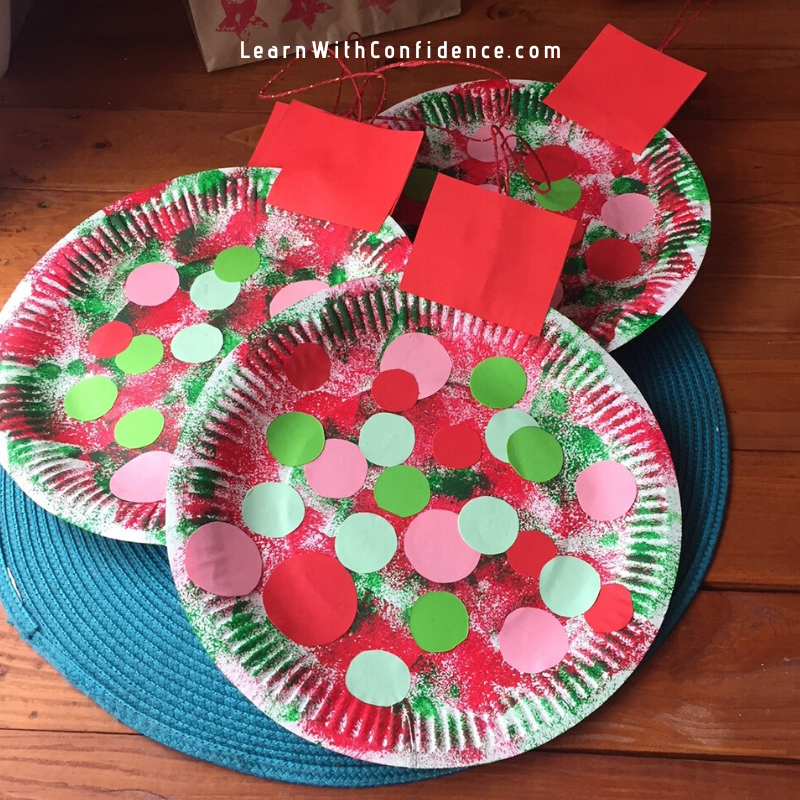
Day 2: Paper Craft – Giant Christmas Baubles
These are a little large for the Christmas tree! (Well, for my tiny tree anyway!) But, what about some giant colourful Christmas baubles hanging in your child’s window!? There’s so much you can do with this idea and make it as simple or elaborate as you like. Here’s the simple version of these Christmas crafts. There are some more ideas in the “Variations” section.
You’ll need:
- Paper plate
- Red and Green paint and brushes or a sponge
- Glue stick
- Cardboard – A4 red (but you could choose any colour!)
- String or ribbon
- Paper cut-outs – circles, snowflakes, whatever you’d prefer.
- Hole punch
Make it happen:
- Use the red and green paint to ‘shade’ the background of your paper plate.
- Decorate the paper plate by sticking down the paper cut-outs.
- Cut out two rectangles (about 5cm x 4cm) for the top of the bauble.
- Punch a hole at the top of your bauble and thread through the string or ribbon. Tie a knot and reposition the knot at the back of the bauble side.
- Paste the two cardboard rectangles to the paper plate – one on the front, one on the back – over the hole and knot of the string / ribbon.
- Hang it up!
Variations:
Draw a simple Christmas drawing with a marker in the centre of the paper plate (eg a Christmas tree, or a pile of presents). Cut out circles or shapes from tissue paper or other thin or translucent paper, paste them over the picture to create the effect of an object being hidden inside the bauble!
Instead of painting, you could use plain white or the already-coloured paper plates.
Hang them up as a garland across a room or against a wall, or use them as Christmas cards for loved ones this year!
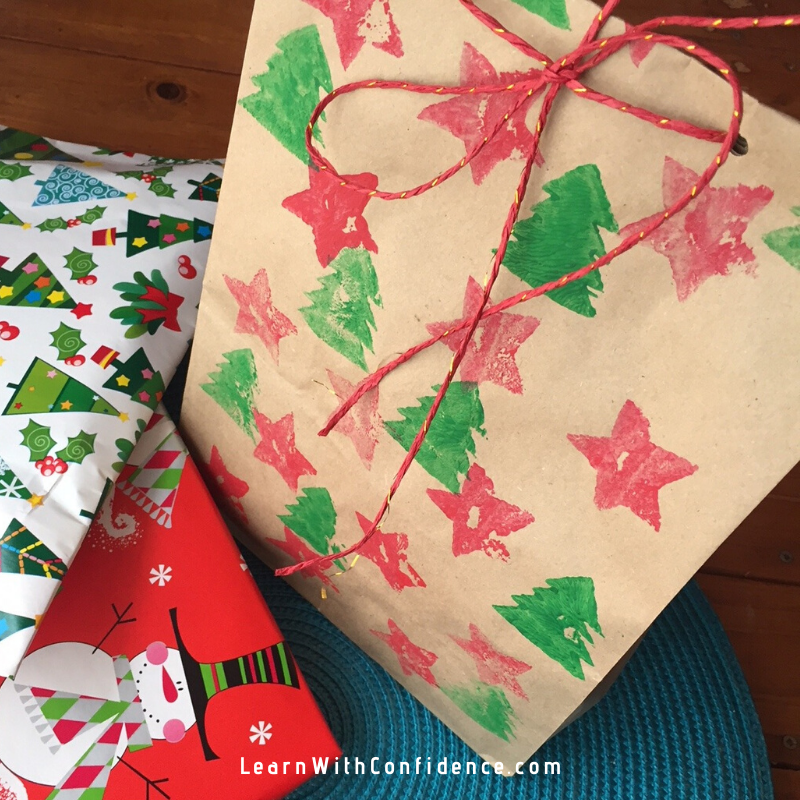
Day 3: Paint it – Potato-Stamp Art on Christmas Gift Bags
Here’s the perfect way to save a bit on gift wrap this year and wow your loved ones with something personal and unique!
You’ll need:
- Templates from the Holiday Fun Kit
- Potatoes
- Small sharp knife
- Marker
- Paint in whichever colours you like
- Paint brush
- Paper bags
- Hole punch and Ribbon
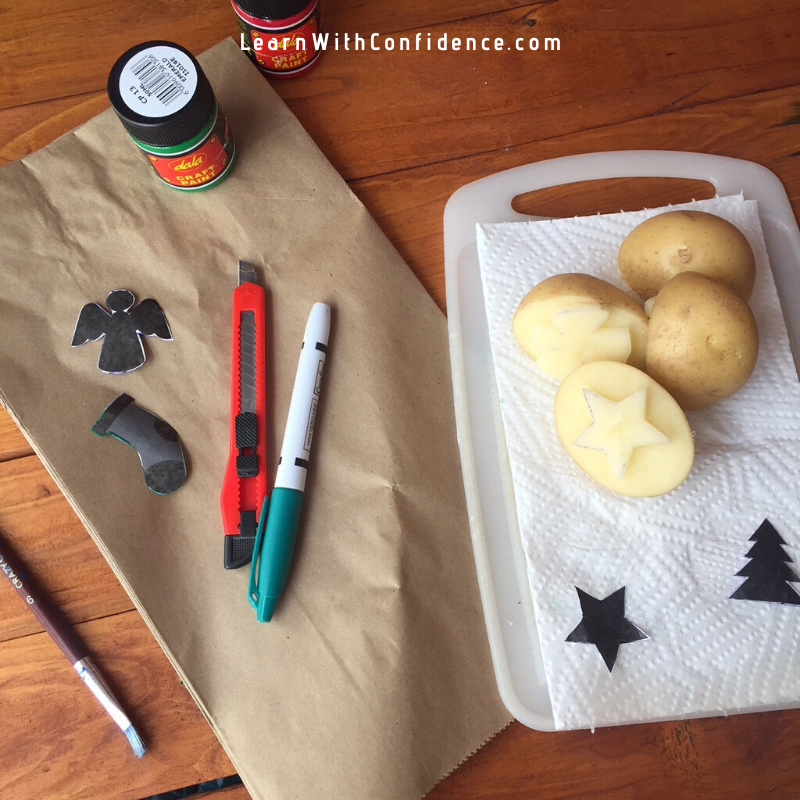
Make it happen:
- Print and cut out the templates for the shapes you want to use.
- Cut the potatoes in half across the width.
- Trace the shapes from the templates onto the potatoes. Cut away the flesh on the outside of the shape to create the stamp.
- Put paint onto the shapes and stamp them down onto the paper bags.
- Finish off the bags by punching holes in the top and threading a beautiful Christmassy ribbon through them.
Variations:
Instead of cutting away the outside, cut away the inside or a “reversed” shape effect.
Instead of using gift bags, use brown paper sheets to create a unique gift wrap!
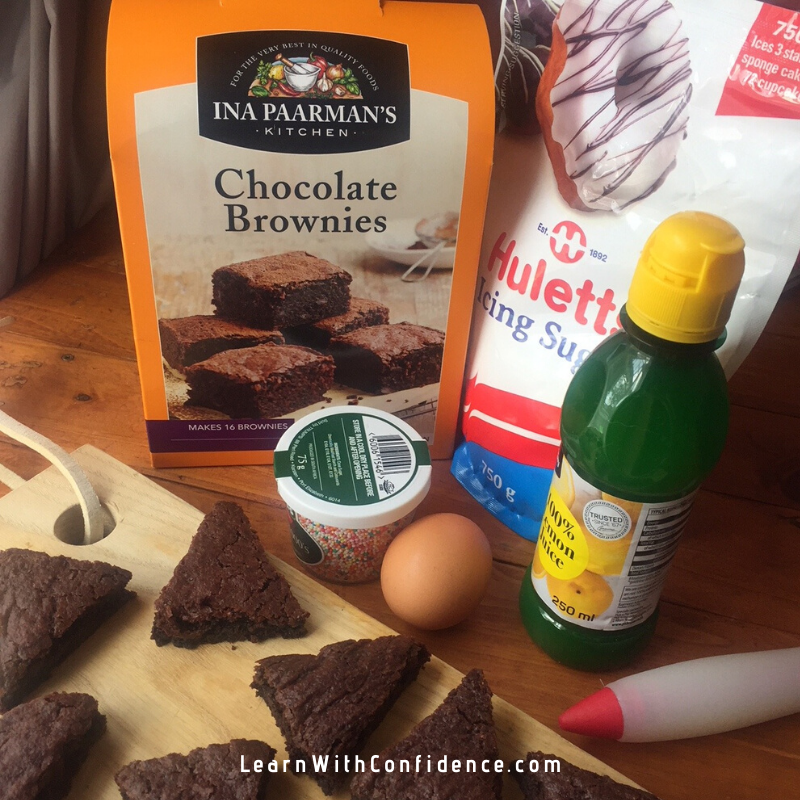
Day 4: Cook, Bake or Decorate – Christmas Tree Brownies
Oh my goodness! Chocolate brownies. Iced as Christmas trees. Yum-o! I’m sure I’ll make these for some get together this Christmas, or maybe just to enjoy at home with our cup of coffee in the afternoon! 😉
You’ll need:
- Templates from the Holiday Fun Kit for Week 2
- Chocolate brownie mix
- Ingredients to prepare the brownie mix – as on the packaging.
- Cake tin – I used my rectangular one that’s about 30x20cm
- Sharp knife
- Icing sugar (250g)
- 1 egg white
- 1 tsp lemon juice
- Green food colouring
- Piping implements, electric mixer, whisk
- Sprinkles
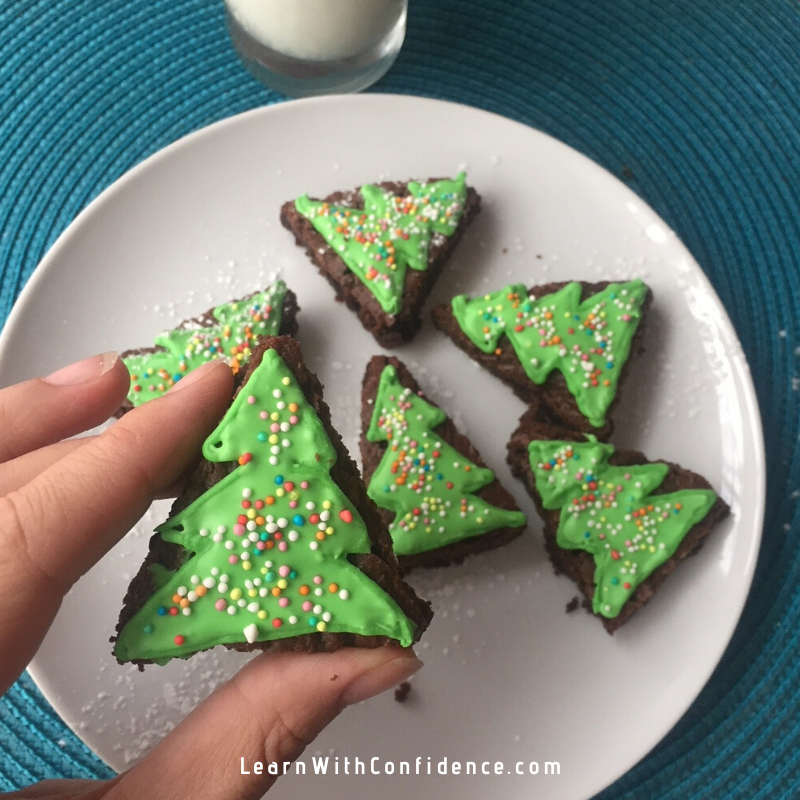
Make it happen:
- Prepare and bake the brownies according to package instructions. Allow to cool completely.
- Cut them along the lines shown in the template so you have triangular brownies.
- Prepare the Royal Icing as follows: Whisk the egg whites in a big bowl until frothy. Add half of the icing sugar and lemon juice and mix with an electric mixer until smooth. Gradually add the remaining icing sugar while mixing until the icing is thick, brilliant white and forms soft peaks. You can add a few drops of water to make the mixture a little thinner if necessary. (You can store royal icing in the fridge in an airtight container.)
- Add green food colouring to the icing and combine well.
- Pipe the icing onto the chocolate brownie as in the template. Add sprinkles!
Variations:
You could cut the brownies into squares and decorate with a variety of Christmas decorations. Picture angels, baubles, holly, snowflakes, candy canes.
As far as icing goes, you can really do whatever colours or details or designs you’d like with the Christmas tree (or decorations) version. You could pipe coloured ‘tinsel’ across the tree, add silver ball sprinkles to look like baubles, add edible glitter to make your Christmas trees sparkle!
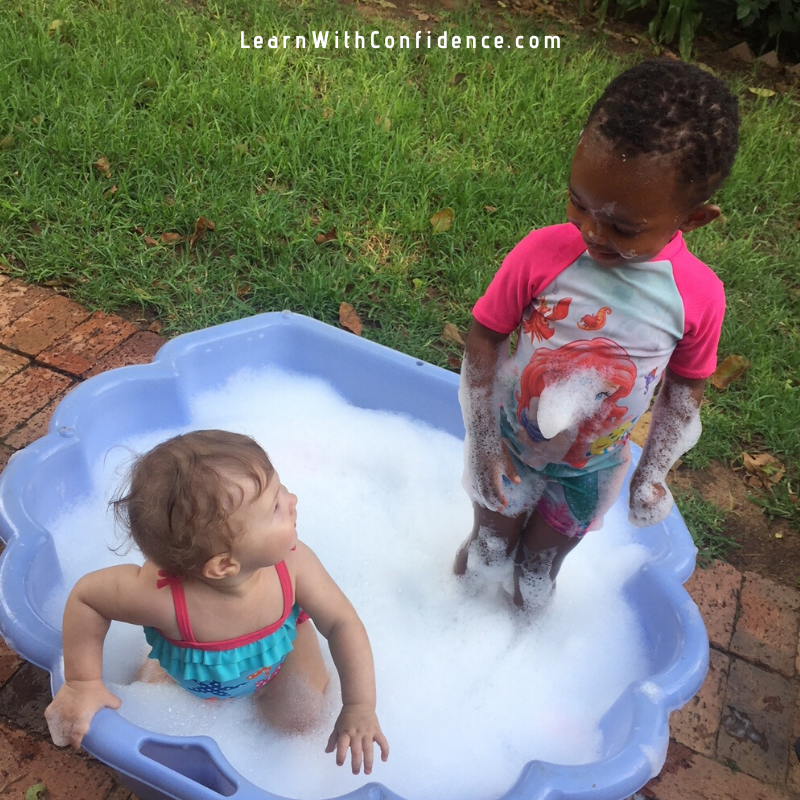
Day 5: Messy Play – Bubble fun
My kids LOVE a bubble bath! Take the fun outside, and to the extreme, this summer!
You’ll need:
- Clam shell / blow-up baby pool
- Bubbles
- Water
- Toys
Make it happen:
- Pour bubble bath liquid into the pool – the more liquid, the more extreme the bubbles!
- Use the hose to fill it up to half way – they’ll really get the bubbles going!
- Toss in the toys and you’re ready to go!
Variations:
For little ones not quite confident to sit on their own, safely, in the water, fill up a large bowl or tub with bubbles, toss in the toys and let them explore while they sit next to it!
(This goes without saying…but, I’ll say it anyway! PLEASE ensure you supervise your kiddies closely, while they play in the water! Better yet, get down there with them and have some fun!)
Here’s to a week of Christmas Fun!
I hope your children will find these Christmas crafts and activities fun and that you’ll be able to use these holidays to spend some special, quality time with your little loves!
To access your Holiday Fun Kit for Week 2, click on the link below. You’ll get all the instructions in a neat, beautiful set up that you can print out and file and keep for next year, as well as all of the templates used for these activities and even a fun shopping list template to make sure you pick up all the necessities while you’re out this weekend!
Did you miss our first week of activities?! Never fear! Here’s a link to last week’s blog post and to your Holiday Fun Kit for Week 1.